Setting Up Incremental Refresh
Note:The SafetyChain Power BI connector is provided to enable data acquisition through the existing RDEA APIs. SafetyChain can assist with troubleshooting issues where the connector is unable to retrieve data from the SafetyChain database. However, configuration and troubleshooting of Power BI–specific features—including on-premises gateway setup, incremental refresh, and web publishing—are outside the scope of SafetyChain support. For assistance with these Power BI features, please refer to the documentation on this page or contact Microsoft Support directly.
What is Incremental Refresh?
Incremental Refresh allows Power BI to retrieve only new or modified data from a data source. It allows us to do that rather than refreshing the entire dataset.
It will store the historical data and only refresh the new data, making the refresh time quicker. By only refreshing new data, it reduces the time it takes to load and process data. For more details on setup please refer to this article.
Pre-Requisites
Before starting please be sure to follow the steps to set up the On-Premise Gateway. This will be needed to connect the Power BI cloud service to the SafetyChain custom connector.
Instructions
- First Open your Power BI Desktop application. Begin by connecting to the SafetyChain application and clicking Transform to access the Power Query Editor. In the power query editor, we start with adding parameters by clicking Manage Parameters. On the Manage Parameters pane click New to add a parameter.
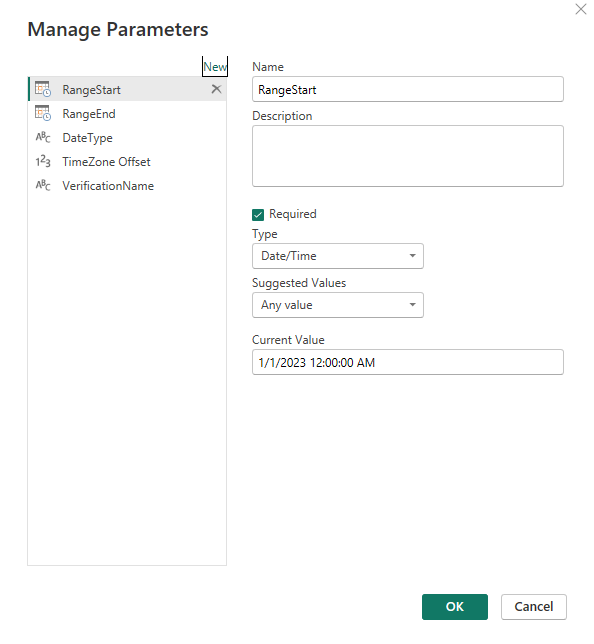
- In this example there are 3 Parameters added, RangeStart and RangeEnd are needed to set up the incremental refresh, these can also be used to invoke the functions; this will simplify the configuration to keep data in sync. RangeStart and RangeEnd must be set to a Date/Time type. I like to use the start and end values that match the current query for the data initially loading.
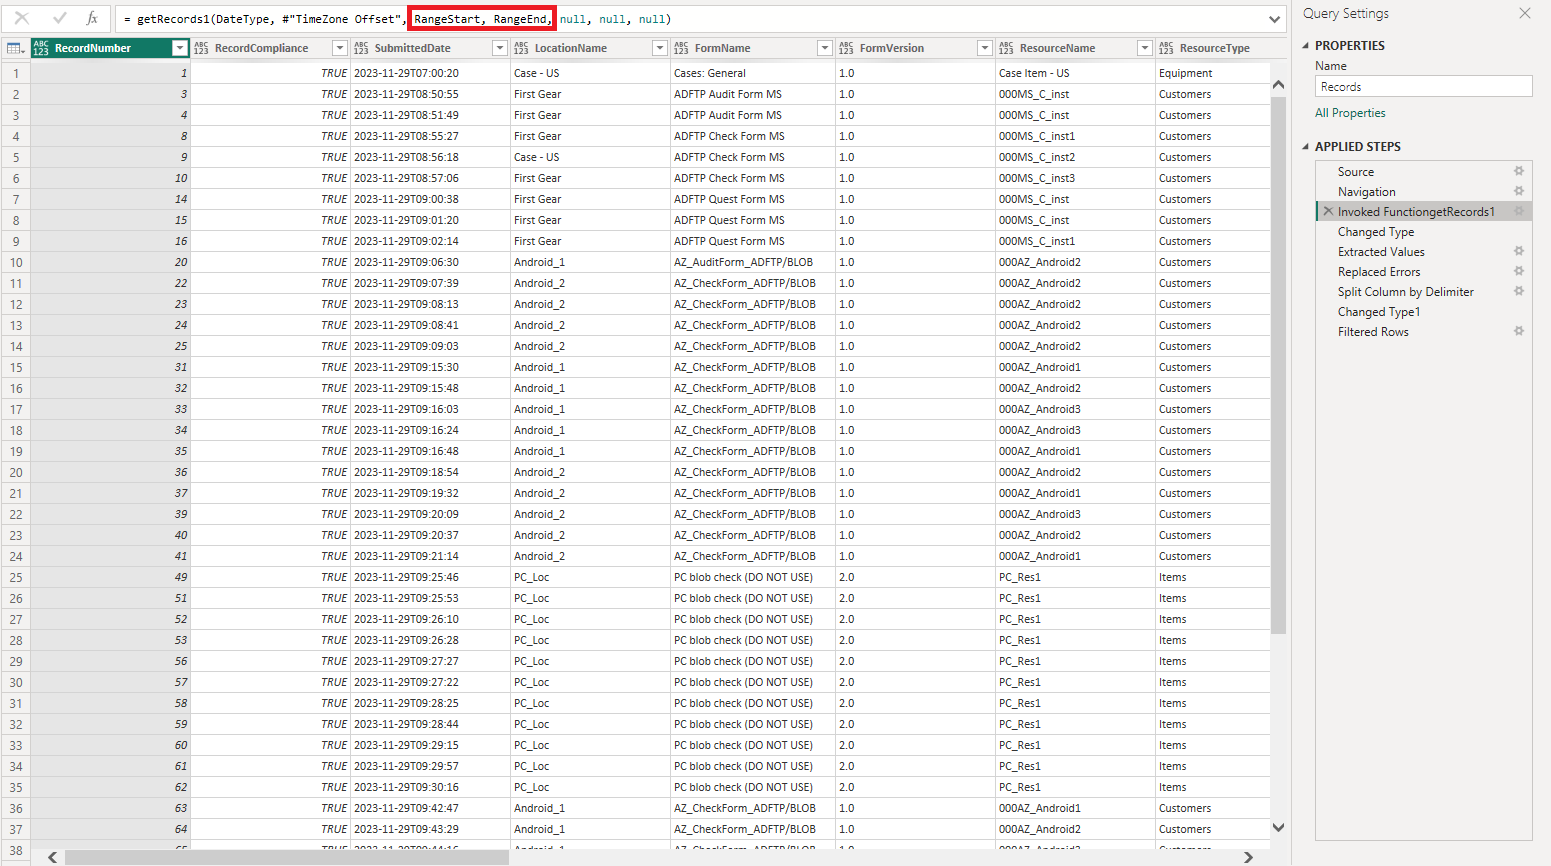
In this example I am invoking the getRecords function with my RangeStart and RangeEnd parameters.
Tip:You can create additional parameters like DateType, TimeZone Offset, etc to be used across all your functions. This will help keep tables in sync if you are using getRecords and getRecordFields functions.
- Once the data table is pulled you will need to convert your date fields you will use to refresh the data. Here I will use the ModifiedDate to configure the incremental refresh. See example below for a query converting the columns to date/time types.
Table.TransformColumnTypes(#"Invoked FunctiongetRecords1",{{"SubmittedDate", type datetime}, {"ModifiedDate", type datetime}, {"ProcessedDate", type datetime}})
Tip:ModifiedDate works well for incremental refresh as it will pick up edits and updates on records as well as new records.
- Once the fields are updated you will need to add a filter on your date field using the parameters RangeStart and RangeEnd. This can be done in power query or in the visual editor.
Table.SelectRows(#"Changed Type1", each [ModifiedDate] >= RangeStart and [ModifiedDate] < RangeEnd)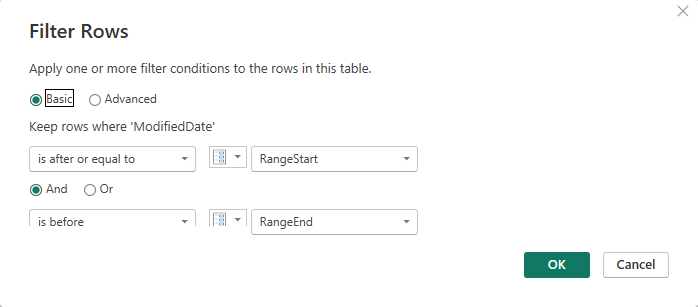
Note:This filter needs to be added to all tables that will have incremental refresh.
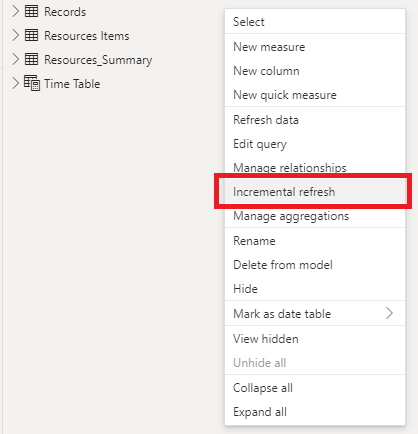
- Now click Close & Apply to load your data to the report. Once the report is loaded under Data, find your table and click the “...” > then Incremental Refresh.
- Here you can set your settings for the data you would like to archive and how much data you will include to refresh. Once your settings are added click Apply.
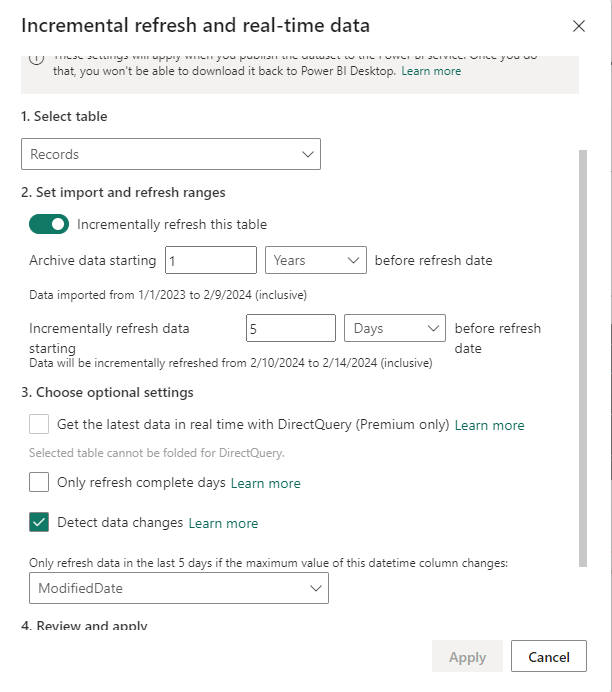
Tip:If using Archive data greater than your RangeStart and if you are using the RangeStart as a parameter for your functions, this will update your initial query.
Using Detect data changes on ModifiedDate will update records that have been updated/edited based on the time period selected. The larger the time period the longer the refresh.
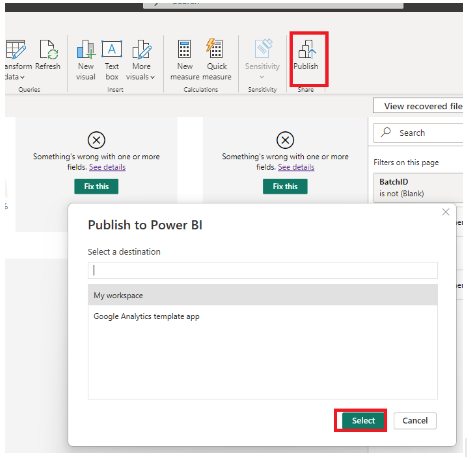
- Save your changes and then click Publish to bring it into your Power BI cloud service.
- Now navigate to the dataset in the Power BI cloud service and go to Settings. Under Refresh > Click On > set your schedule and click Apply.
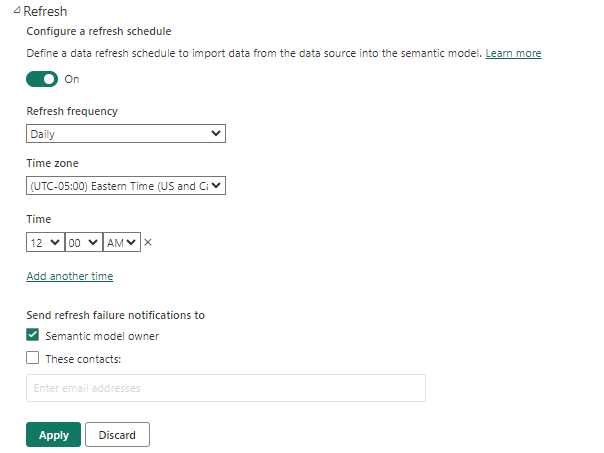
Note:Remember, your dataset must be connected through the gateway to set up the scheduled refresh and the gateway must be online when the refresh starts.. In addition to the schedule you can refresh the dataset on demand by selecting Refresh Now on the dataset.